Halloween is a great opportunity to get creative and get crafting. With numerous fun ideas which can be completed in the classroom and taken home, it’s hard to pick just one!
Our Halloween crafting includes a range of ideas for all ages and abilities. Now is the time to start planning what your classroom can create for the spoooooky season.
Spooky Face Lanterns
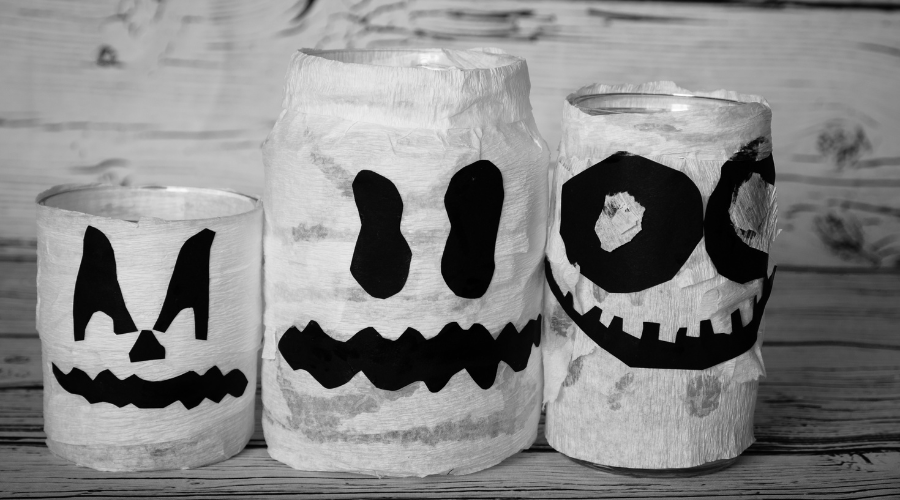
These mummy lanterns are great for putting into the window or dotting around the kitchen at a Halloween party. With only a few materials needed, you can reuse old glass jars and clear plastic cups to create these lanterns.
Difficulty: Easy
What you’ll need:
- Glass/ plastic jars
- White tissue paper
- Black paper
- Scissors
- PVA glue
- Glue brush/ spreader
- Battery-powered tea light
How to create:
- Ensure that your jars are clean and any stickers have been removed
- Cut the white tissue paper into long strips
- Apply a generous amount of PVA glue to the outside of the jar
- Wrap the tissue paper around the jars, not being too neat
- Repeat the above step until you are happy with the look (ensuring not to use too much tissue paper as the light won’t shine through)
- Cut out spooky face shapes using the black card
- Stick these to your jars using glue
- Leave to dry completely
- Once dry, put your battery-powered tea light inside, and see the spooky face light up!
Spider Pencil Toppers
.png?width=900&name=Paper%20plus%20blog%20image%20%20(2).png)
Make classroom work and homework fun with these spider pencil toppers. A great crafting idea that requires a little effort but the rewards are spooktacular. With a range of coloured pipe cleaners, the designs are endless and each will have its own little personality.
Difficulty: A little effort
What you’ll need:
How to create:
- You’ll need 9 pipe cleaners per spider: 4 of one colour, 4 of another colour, and 1 of another colour
- Take the 2 sets of 4 pipe cleaners. Take opposite colours and create a spiral pattern with 2 of the pipe cleaners. One spiral pipe cleaner will make up 2 of the spider’s legs.
- Repeat the above stage with the remaining 6 pipe cleaners
- Take the 1 remaining pipe cleaner and bend it in half, wrap the centre of the pipe cleaner around the pencil and secure it with glue and allow it to dry
- Once secure wrap the pipe cleaner on the pencil around the middle of the 4 spiral pipe cleaners, and secure it with glue
- Shape the 4 spiral pipe cleaners into spider legs
- With the remaining length of the pencil pipe cleaner, shape it into the front legs
- Glue a large pompom to the top of the spider's legs and glue another smaller pompom on for the head
- Glue some googly eyes onto the head of the spider
3D Pumpkin with Seeds
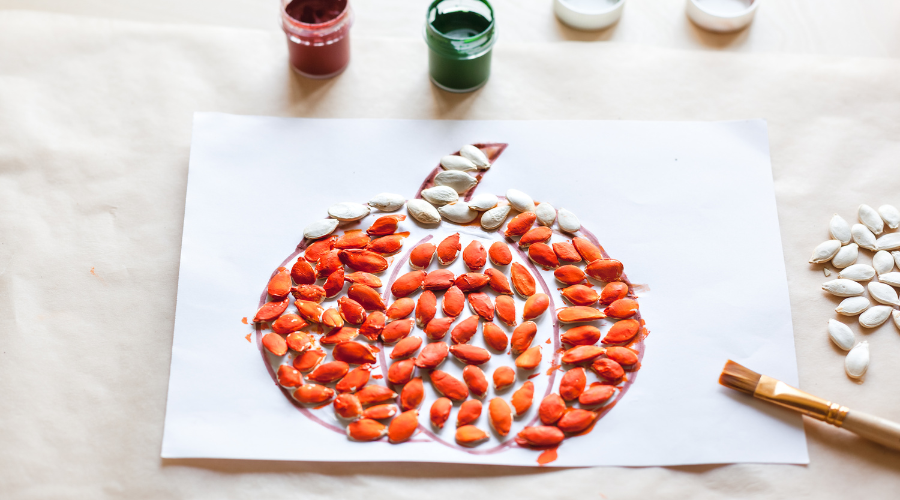
Perfect for using up the leftover pumpkin seeds from pumpkin carving. (Just make sure you wash them first!) This crafting idea is great for smaller children as it’s a little simpler and requires less effort. For ease, trace out the pumpkin shapes for the children.
Difficulty: Easy
What you’ll need:
- White paper or card
- A pencil
- PVA glue
- Glue brush/ spreader
- Pumpkin seeds (left over from pumpkin carving)
- Paintbrush
- Orange and green paint
How to create:
- Sketch out a simple pumpkin shape on the paper with defined sections
- Apply the glue to one section of the pumpkin
- Add the seeds to the glued section of the pumpkin and fill the space
- Repeat the above 2 steps until the whole of the pumpkin is filled in with seeds
- Leave the glue to dry
- Paint the orange paint onto the seeds on the relevant sections of the pumpkin
- Paint the green paint onto the seeds on the stalk
- Leave to dry and you’re all done!
Funny Monster Keychains
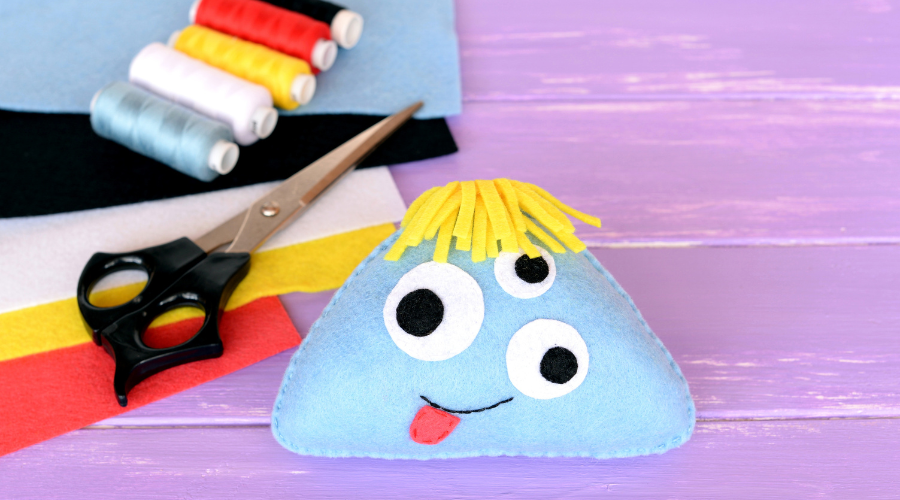
A creative crafting idea that you can actually keep! These funny monster keychains do require effort and skill, plus the maturity of your students (with using needles). But the results are just awesome! Your students can design their own monster faces and create something personal to them. If this project does seem a little lengthy, set this up as a project and create it over a period of 4 or 5 lessons.
Difficulty: A lot of effort
What you’ll need:
- Paper
- Pins
- Various colours of felt
- Needle
- Various colours of thread
- Filling (you could use fabric scraps, cut up into small pieces)
- Scissors
- Hole punch
- Keychain
How to create:
- Create template shapes using the paper and cut them out. You’ll need templates for the: front, back, eyes, pupils, mouth, hair, and other features
- Pin the template shapes to the felt using the pins
- Cut out the template shapes from the felt
- Once all the shapes are cut out, lay out all of the felt shapes and double check you have all of the components
- Take the front and back pieces of felt, line up and hole punch at the top of the shape to thread the keyring through later
- Begin by sewing all of the facial features to the front piece e.g. the eyes, mouth, hair
- Once all of the facial features have been attached, line up the front and back pieces and begin sewing these together, ensure to only sew around 80% of the edges together
- Push filling into the monster through the gap
- Once filled, sew the rest of the edges together
- Thread through the keyring loop and ta-da!
Spiders Web Bunting

A striking bunting design, perfect for hanging around the house or on the front door. Create 5, 10, or 50! Rather simple and straightforward once you get the hang of making these spider webs. Great for a range of children of ages.
Difficulty: A little effort
What you’ll need:
How to create:
- Take a piece of white paper and cut this to create a perfect square shape
- Fold the square diagonally into a right-angled triangle
- Fold the triangle in half to make another triangle, so that all of the corners meet
- Fold in half a third time. You should still have a right-angled triangle.
- Fold once more, bringing the folded edge over to meet the longest side.
- Trim the uneven ends of the triangle into an inverted curve. It’ll look a bit like an ice cream cone.
- Cut out curved rectangles down the length of the cone from one side only, being sure not to cut all the way through to the other side.
- This guide provides images on the above steps: https://www.firstpalette.com/craft/paper-spider-web.html
- Once your spider's web shape is created, either apply glue stick to one side of the shape and stick it onto the black paper, or punch a hole in the top of the web, thread through the string, and hang up!
Contact us
For more advice on everything school related, explore our wide range of blogs. Or if you’d like to get in touch with us, please email us at sales@paperplusuk.com or call us on 01444 238 050